About
rcognita is a flexibly configurable framework for agent-enviroment simulation with a menu of predictive and safe
reinforcement learning controllers. It is made for researchers and engineers in reinforcement learning and control theory.
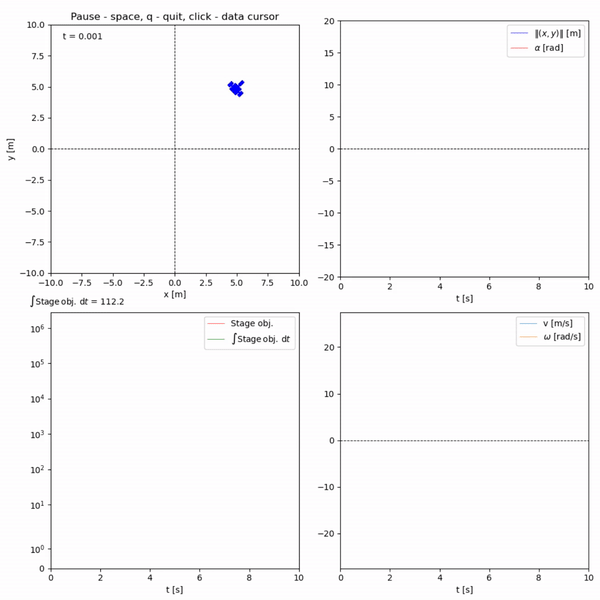
Example run with a mobile robot simulation
Installation
Basic
Run in terminal:
pip3 install rcognita
Alternatively, one can install the package direcly form the master branch. The following instruction is for Unix-based systems, assuming a terminal and Python3 interpreter.
git clone https://gitflic.ru/project/aidynamicaction/rcognita.git
cd rcognita
pip3 install .
Notice that your Python 3 interpreter might be called something else,
for instance, just python.
With PyTorch for neural networks
It is common for deep reinforcement learning software to make use of
advanced frameworks for building and training neural networks. rcognita
supports integration with PyTorch, a powerful Python interface for deep learning.
Here is how to install rcognita together with PyTorch.
pip3 install rcognita[TORCH]
or
git clone https://gitflic.ru/project/aidynamicaction/rcognita.git
cd rcognita
pip3 install .[TORCH]
With CasADi for nonlinear optimization
In model predictive control it is important that one can time-efficiently optimize over numerically integrated
ODEs. rcognita interfaces with CasADi, a python package that offers an efficient and convenient
toolset for optimization tasks of this kind.
Here is how to install rcognita together with CasADi.
pip3 install rcognita[CASADI]
or
git clone https://gitflic.ru/project/aidynamicaction/rcognita.git
cd rcognita
pip3 install .[CASADI]
You can use both CasADi and PyTorch. They are not mutually exclusive.
What is rcognita?

rcognita Python package is designed for hybrid simulation of agents
and environments (i.e. controllers and control-systems). rcognita allows one to
simulate either discrete-time systems (environments) or continuous-time systems (environments)
with sampled feedback (agents that react to their observations at a finite frequency).
For instance, if you have a model of a robot and an agent of some kind, rcognita would allow
you to see how the robot would behave if this agent controlled the robot by
issuing its actions at a given rate.
import numpy as np
from rcognita.simulator import Simulator
from rcognita.systems import System
from rcognita.controllers import Controller
from scenarios import EpisodicScenario

class MyRobotSystem(System):
    ...  ## Define the robot

class MyAgent(Controller):
    ...  ## Define what your agent does

rate = 0.1  ## The agent performs actions once every 100ms
initial_state = np.zeros(...) ## In which state the robot will start

robot = MyRobotSystem(...)
controller = MyAgent(...)
simulator = Simulator(robot, initial_state, sampling_time=rate)
scenario = EpisodicScenario(simulator, controller)
scenario.run()
Not only can you use rcognita to simulate things, but you can also
use it to run your training and tuning. Scenario objects are also meant to
manage your training pipeline for RL (if needed):
import numpy as np
from rcognita.simulator import Simulator
from rcognita.systems import System
from rcognita.controllers import RLController
from rcognita.actors import Actor
from rcognita.critics import Critic
from scenarios import EpisodicScenario

class MyRobotSystem(System):
    ...  ## Define the robot

class MyActor(Actor):
    ...  ## Your custom actor

class MyCritic(Critic):
    ...  ## Your custom critic

def my_reward(state, action):
    return ... ## How the agent is rewarded

rate = 0.1  ## The agent performs actions once every 100ms
initial_state = np.zeros(...) ## In which state the robot will start

robot = MyRobotSystem(...)
actor = MyActor(...)
critic = MyCritic(...)
controller = RLController(actor=actor, critic=critic)
simulator = Simulator(robot, initial_state, sampling_time=rate)
scenario = EpisodicScenario(simulator, controller, objective=my_reward)
scenario.run()
The main intended advantages of rcognita are customizability and modularity.
For instance if you wanted to try out your own numerical methods for integrating
ODEs and whatnot, you could simply:
class MySimulator(Simulator):
    ... ## Your methods
This applies to just about any entity in rcognita. Want a more advanced
training pipeline? All it takes is too derive your own Scenario.
Want to push the boundaries of what an RL agent looks like? Say no more:
just derive a child from RLController and modify it to your heart’s content.
Be sure to hit the API docs (or the source code) if you want figure out the best way of deriving something yourself. In most cases you’ll find that only a few methods need to be overriden to produce the desired result. In fact, in a great number of cases no deriving is necessary.
rcognita’s config pipeline
RL and control theory are infamous for having overwhelmingly many entities to keep track of: agents, environments, models, training routines, integrators, predictors, observers, optimizers… Each of the above in turn has a number of parameters of its own, and to make things worse, your setup will most likely be highly sensitive to all of these. Therefore tweaking and tuning your setup may and will get tedeous unless you figure out a way to do it conveniently and systematically.
Enter hierarchical configs! Rcognita has a builtin hierarchical config pipeline
built on top of hydra. It must be noted that a regular hydra
config will run on rcognita just fine (but not vice versa), since
rcognita includes all of the original features and syntaxes of hydra.
However rcognita additionally provides convenient syntactic sugars that
hydra does not posses.
Keep in mind that using rcognita’s config pipeline IS NOT mandatory and
the examples mentioned in the previous section are totally valid. However, in
a more realistic usecase one will often find that the utility of
rcognita’s configs is IMMEASURABLE.
The reader is thus encouraged to familiarize themselves
with hydra.
Example 1
Consider the following files in your hypothetical project.
my_utilities.py:
from rcognita.systems import System
from rcognita.controllers import Controller

class MyRobotSystem(System):
    def __init__(self, x, y, z):
        ...

    def ...

class MyAgent(Controller):
    def __init__(self, a, b, c):
        ...

    def ...
my_config.yaml:
rate: 0.1

initial_state: = numpy.zeros(5) # The '=' lets us evaluate this
                                # python code 'numpy.zeros(5)'

robot:
    _target_: my_utilities.MyRobotSystem # '_target_' is a special field
    x: 1                                 # that should point to a class
    y: 2
    z: 3

agent:
    _target_: my_utilities.MyAgent
    a: 3
    b: 4
    c: 5
main.py:
import rcognita as r
from rcognita.simulator import Simulator
from rcognita.scenarios import EpisodicScenario
import my_utilities
import numpy


@r.main(
    config_path=".",
    config_name="my_config",
)
def my_app(config):
    robot = ~config.robot      # '~' instantiates the object
    controller = ~config.agent # described in the corresponding
                               # field. It makes use of '_target_'.
    simulator = Simulator(robot,
                          config.initial_state,
                          sampling_time=config.rate)
    scenario = EpisodicScenario(simulator, controller)
    scenario.run()


if __name__ == "__main__":
    my_app()
The above example project is the equivalent to the first example in section
“What is rcognita?”. Here instead of providing args for
MyRobotSystem and MyAgent inside the python script, we instead specify
both the classes and their args in my_config.yaml.
Note, that the operator ~ is necessary to let rcognita know that
the corresponding node within the config describes an instance of a class
and we would like to instantiate it
(as opposed to accessing it as a config-dictionary).
In other words ~config.robot evaluates to
<my_utilities.MyRobotSystem object at 0x7fe53aa39220>
, while config.robot evaluates to
{'_target_':'my_utilities.MyRobotSystem', 'x':1, 'y':2, 'z':3}
Example 2
Note, that when using this config paradigm nothing impedes us from instantiating literally everything directly inside the config, leaving the python script almost empty. Here’s an example of how this can be done:
my_utilities.py:
from rcognita.systems import System
from rcognita.controllers import Controller

class MyRobotSystem(System):
    def __init__(self, x, y, z):
        ...

    def ...

class MyAgent(Controller):
    def __init__(self, a, b, c):
        ...

    def ...
my_config.yaml:
_target_: rcognita.scenarios.Scenario

simulator:
    _target_: rcognita.simulator.Simulator
    system:
        _target_: my_utilities.MyRobotSystem
        x: 1
        y: 2
        z: 3
    initial_state: = numpy.zeros(5)
    sampling_time: 0.1

controller:
    _target_: my_utilities.MyAgent
    a: 3
    b: 4
    c: 5
main.py:
import rcognita as r
import my_utilities
import numpy


 @r.main(
     config_path=".",
     config_name="my_config",
 )
 def my_app(config):
     scenario = ~config
     scenario.run()


 if __name__ == "__main__":
     my_app()
This way of doing it has numerous advantages. Notably, you can now conveniently override any input parameters, when running the script like so
python3 main.py controller.a=10
or even
python3 main.py simulator._target_=MyOwnBetterSimulator
A more detailed tutorial on building rcognita applications using the config pipeline
can be found here .
Presets
To get started with using rcognita the reader is advised to examine some concrete usecases.
rcognita’s repository contains an
assortment of presets, which can be both studied and conveniently repurposed.
The presets directory contains several working rcognita projects:
presets/3wrobot: Parking a three wheeled robot.presets/3wrobot_ni: Parking a massless three wheeled robot.presets/grid_world: Path-finding in a gridworld.presets/inverted_pendululm: Balancing and inverted pendulum.presets/2tank: Equalizing water levels in a two-tank system.
For instance, if one wanted to run the three wheeled robot parking project, all it would take is to execute the following:
cd presets/3wrobot
python3 main.py
One could also override some of the global parameters when running the script. For instance:
python3 main.py sampling_time=0.2 time_final=20
Below is a table detailing some of the available overridable parameters for the presets:
Parameter |
Type |
Description |
|---|---|---|
|
|
Controller sampling time |
|
|
Final time |
|
|
Initial state |
|
|
Flag to supress graphical output |
|
|
Horizon length (in steps) for predictive controllers |
|
|
Critic stack size (number of TDs) |
|
|
Discount factor |
|
|
ODE solving backend for simulation. “SCIPY” or “CASADI” |
|
|
Makes the animation |
Parameters marked with a “*” are not present in presets/grid_world.
It must be noted that one could in theory override any of the parameters
defined in the preset’s config (i.e. presets/*/scenario.yaml), because
that’s just how the config pipeline works.
For instance, if you wanted to speed up you simulation you could try messing
with the ODE solver’s tolerances:
python3 main.py simulator.atol=0.1 simulator.rtol=0.1
You could, of course, instead just edit the config.
Closing remarks
Please contact me for any inquiries and don’t forget to give me credit for usage of this code. If you are interested in stacked Q-learning, kindly read the paper.
Original author: P. Osinenko, 2020
Bibtex reference
@misc{rcognita2020,
author =   {Pavel Osinenko},
title =    {Rcognita: a framework for hybrid agent-enviroment simultion},
howpublished = {\url{https://github.com/AIDynamicAction/rcognita}},
year = {2020}
}
For developers
Building docs
Here’s a short guide on how to build the docs on Ubuntu/Debian.
Before building docs, make sure you have adequate dependencies installed:
pip3 install rst-to-myst==0.3.3 sphinx==4.0 -U
It is also necessary for rcognita’s dependencies to be installed,
which can be accomplished by running the following inside rcognita’s repository folder:
python3 setup.py install .
Once the dependencies are installed proceed to execute the following in rcognita’s repostitory
folder:
cd docsrc
make
Note that the contents of README.rst are automatically incorporated into the docs.
Contributing
If you’d like to contribute, please contact Pavel Osinenko via p.osinenko@gmail.com .
If you’d like to request features or report bugs, please post respective issues to the repository .
Forking
When forking rcognita, please, be sure to either delete the docs or modify them in such a way that it
becomes clear that your fork is not in fact the original rcognita.